Posts

Showing posts from February, 2015

Recap February Pretties

Image
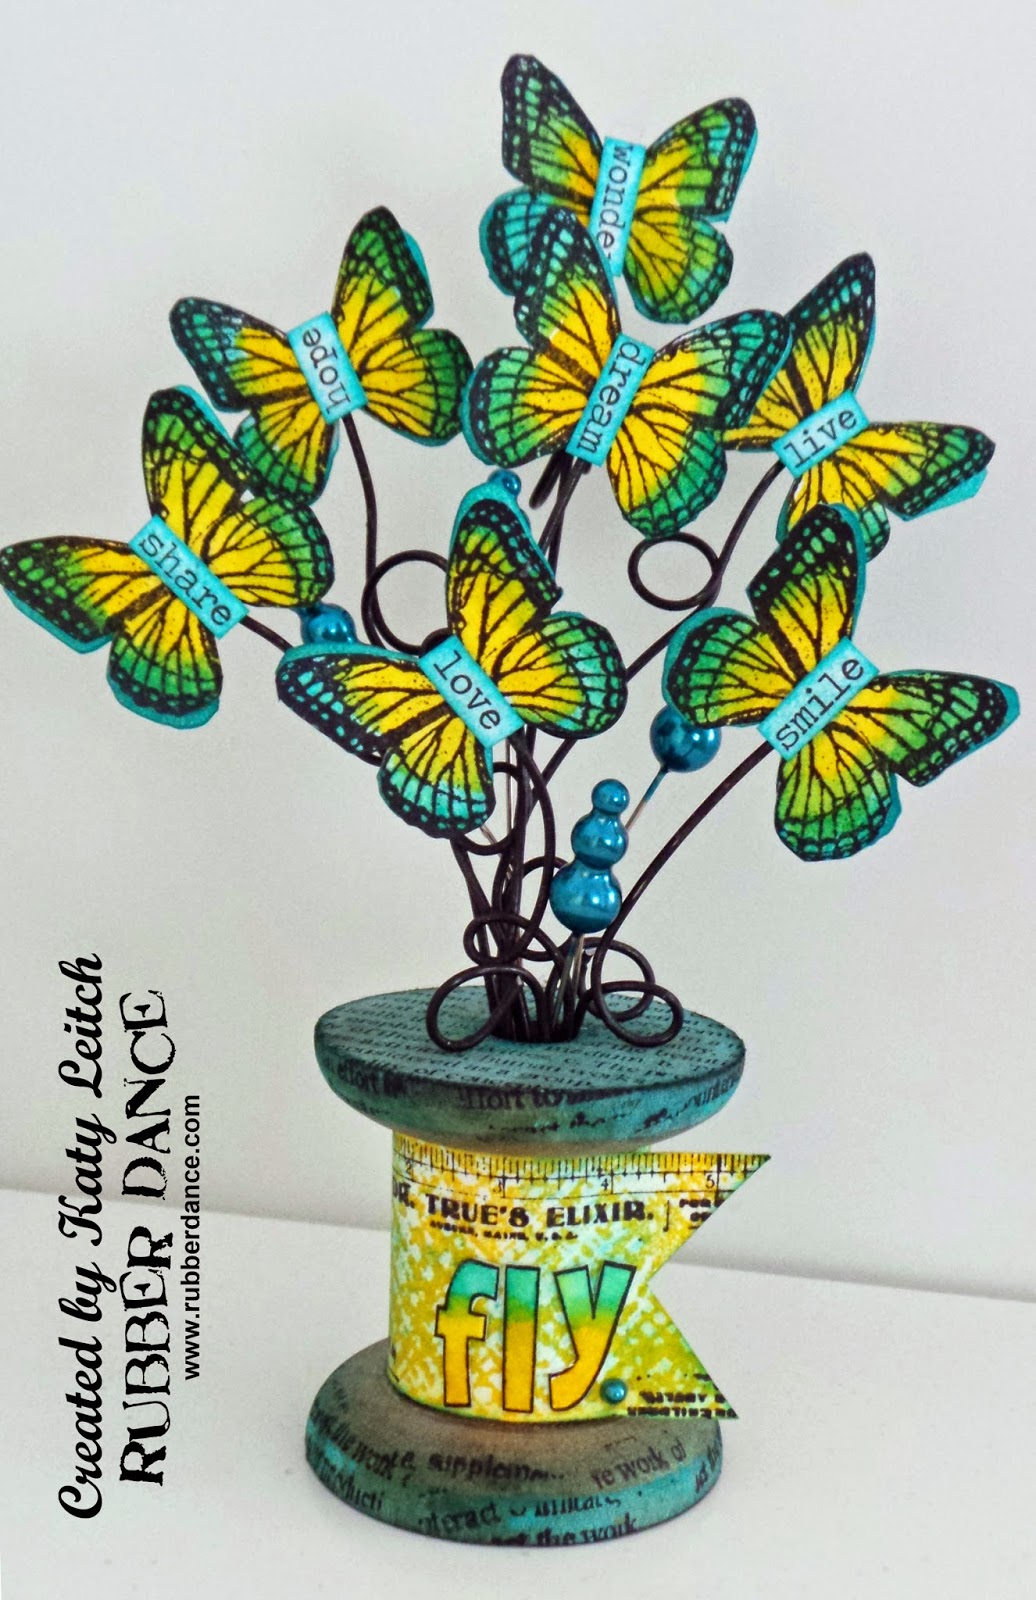
Hey, friends and fans and fans of friends! :-) It's been a short month of only 28 days, but that hasn't stopped us from being busy creative bees. Here are just a FEW of the pretties we've made this month: Card by Susanne Card by Bibi Valentine's Art Journaling by Gabriele Card by Majo Fun shaped card Majo "Is it ever enough?", art journal page by Gabriele Canvas by Susanne for Faber-Castell at the Paperworld show ( video tut here ) Art Journal page by Gabriele Card with a twist by Helen ( video tut here ) Heart tag decoration by Katy Tag by Majo Art Journal page by Gabriele Susanne for Noor! Design (the let's party stamp is from Rubber Dance) Card by Susanne Valentine Bunting by Helen ( video tut here ) Valentine card by Helen ( video tut here ) ATCs by Susanne Altered book by Katy for the Unruly PaperArt's theme BOOKS

Flower to my Lover

Image
Hi everyone! It's Bibi here today, just to show you the card I made for my sweetie on Valentine's day. We don't really celebrate it (not a tradition here in Norway), but I do make him a card every year and he gives me flowers. Usually I make him a more masculine looking card, but this year I decided to make something completely different. When I started making this card, what you see here was meant to be the background paper with a panel with some romantic stamp and message on top .... but once it was finished, I liked it so much that I didn't want to cover it with anything, so ... pretty plain and simple, here it is: Supplies: Watercolor paper Inktense pencils and waterbrush Love washi tape Black Archival ink Stamps from this set: Antique Botanicals This set measures 13 x 18 cm (5 x 7 inches) Katy on my Design Team made this set of stamp designs for me. They are vintage etchings that she compiled and revised to make them suitable f

With Love from Majo

Image
Hello everyone! It's Majo from the design team showing you a tag I created for a friend for Valentine's day. This is what I used: I started with a #5 Tag from Sizzix and covered it with design paper. I cut and heat embossed the label. The lady was stamped from the *DaVinci* set , my most favorite stamp, the sentiment from the set *Just a note* I embossed the 2 hearts, cut the lace and assembled everything on the tag. A piece of lace, 2 star brads and my *Love* tag was ready to go to a friend for Valentine’s day.   I hope you've enjoyed my tutorial and I wish you a wonderful Sunday! Majo To find the stamps I have used, and many more, here's the Rubber Dance web shop: www.rubberdance.com

Fun transfer technique with rubber stamps

Image
Hello my dear friends! It's Irit here, and today I am going to share my new technical tutorial made with Rubber Dance gorgeous big stamp from the Women Collage set. All you need is a deep edged red rubber big stamp, gel medium and a lot of patience... Let's see how to make this project: 1. Cover the red rubber stamp with a thick layer of Gel Medium. I used whatever I found here in Israel; you can try any kind you have and I am pretty sure the results will be the same. On the photo you see two stamps covered with Gel Mediums, but for the final project I used the Woman image only. Here you can see it dry- after 24 hours at least- and peeled from the stamp. 2. Paint over the peeled image with black acrylic paint and let it dry. Wipe the extra paint so you just see a bit of black over the image. 3. Make the frame from a chipboard and cover it with a few layers of copper embossing powder.  Cover the black painted piece with a layer of copper pigment powder (not the

Take Flight

Image
Hello everyone! My make for today is a little something to brighten up my craft space. I found this old fashioned, oversized cotton reel in my local craft shop - it found its way into my shopping basket but it's been sitting unloved in a drawer for quite a while! Now thanks to these lovely Rubber Dance stamps it's a little piece of art, bursting with fluttering butterflies and inspiring words. I used images from lots of different sets here - showing how well RD stamps mix and match. I was really quite easy to make - here's how! STEP 1: Stamp lots of butterfly wings and colour them using Distress Sprays and a paintbrush, blending the colours. I used Peacock Feathers and Mustard Seed. Cut them out and ink the backs with Distress Ink (as some of the back will be visible). STEP 2: Cut some narrow strips of cardstock and join pairs of wings together on the reverse. Allow the glue to dry before going on to the next step. I made 14 pairs of wings. STEP 3: Sh